Why Winter Is The Perfect Time To Plan Your Hardscaping Projects For Next Year

As the temperatures drop and winter settles in, it’s natural to assume that outdoor projects have to wait until spring. The thought of tackling a new patio, walkway, or outdoor living space might seem like something for warmer days. However, winter is actually the ideal time to start planning your hardscaping project for the upcoming year. Here’s why:

1. Start Your Project Early—Beat the Spring Rush

Spring and summer are the peak seasons for hardscaping projects, meaning that contractors often have full schedules. By starting the planning process during the winter, you can get ahead of the crowd. You’ll have plenty of time to design your dream outdoor space and secure the services of your preferred contractor, without having to wait months for a start date.

2. Take Advantage of Design and Rendering Services

One of the biggest benefits of planning in the winter is the opportunity to use design and rendering services. These tools allow you to see exactly how your new patio, walkway, firepit, or other hardscaping features will look on your property. With advanced technology, we can create detailed 3D visualizations of your project, giving you a clear idea of how the design will fit into your space.

These renderings help you make informed decisions about materials, layout, and color choices, ensuring that your vision aligns with your expectations. Imagine being able to “walk through” your future outdoor living space before the first stone is even laid! This level of clarity can make all the difference when it comes to finalizing your design.

3. Design with Seasonal Considerations in Mind

Winter planning also allows you to think about the long-term impact of your hardscaping. This is the perfect time to consider how your space will look throughout the year—both during the warmer months and as winter sets in again. With your design in hand, you’ll be able to plan for elements like proper drainage, seasonal planting, and features that will make your space functional and beautiful year-round.

4. Make Changes Without Pressure

One of the challenges of starting a project in the spring is the rush to finalize everything before the busy season begins. When you start planning in the winter, you have time to refine your design, make adjustments, and explore different options without the pressure of looming construction deadlines.

5. Get Ready for a Stress-Free Start in Spring

By taking the time now to plan and visualize your hardscaping project, you’ll be fully prepared to hit the ground running when spring arrives. All the hard work of design, material selection, and budgeting will be done, and you can jump right into the installation process as soon as the weather allows. This means a smoother, more efficient project and fewer delays when the season kicks off.

Final Thoughts

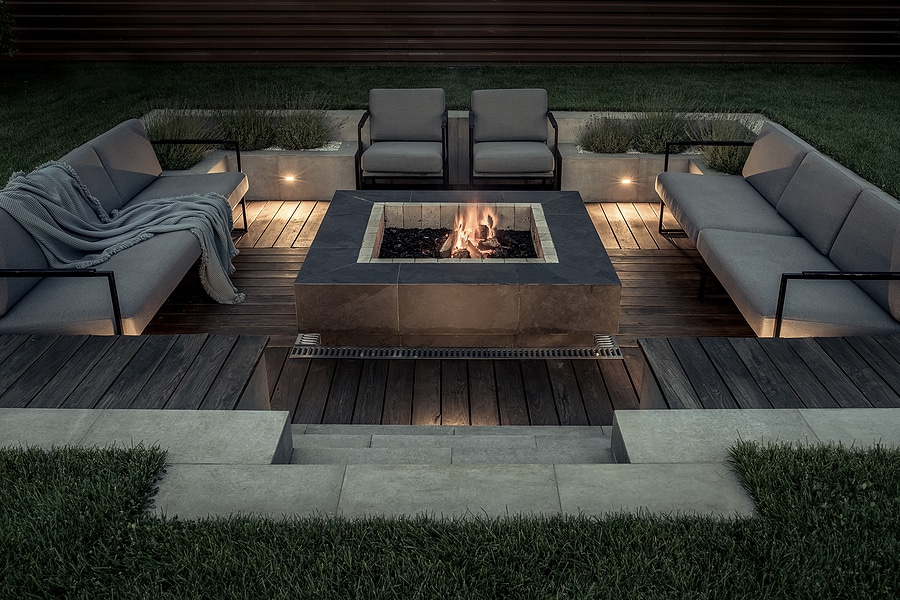
Winter doesn’t have to be a time for hibernation when it comes to your outdoor spaces. Take advantage of the season’s slower pace to plan and design your hardscaping project for next year. Whether you’re envisioning a cozy firepit, a new patio, or a complete outdoor living area, our design and rendering services will help bring your ideas to life. The best part? You’ll be ready for the warmer days ahead, knowing exactly how your outdoor space will look and function.

Don’t let the winter months slow you down—let’s get started on making your dream outdoor space a reality!


How to Use Lighting to Enhance Your Hardscape Design

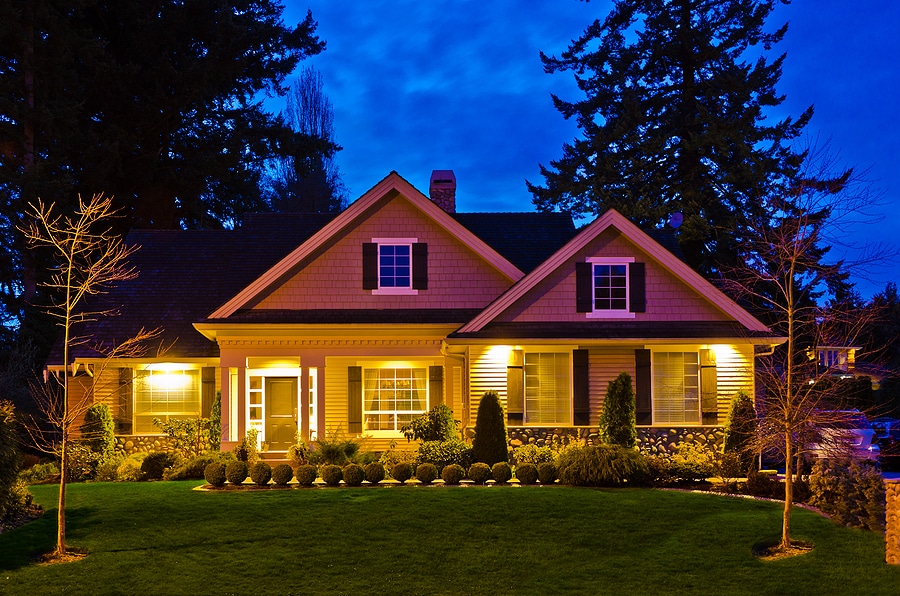
Outdoor lighting is a game-changer when it comes to transforming hardscapes. Well-planned lighting not only highlights your design’s best features but also brings safety, functionality, and atmosphere to any outdoor space. Here at J Squared Outdoor, we’ve seen firsthand how the right lighting can elevate a landscape, turning it into a space you’ll love spending time in day or night.

In this post, we’ll guide you through the benefits of hardscape lighting, offer tips for creating an enhanced look, and share some inspiration to get you started on your outdoor transformation!

Why Lighting Matters in Hardscape Design

  1. Showcasing Design Features

    • Lighting brings out the best in your hardscape elements, whether it’s a stone wall, water feature, or a custom patio. Highlighting these features after dark not only makes them visible but enhances their texture and color, adding a new level of dimension to your space.

  2. Safety and Usability

    • Functional lighting around steps, pathways, and driveways keeps your outdoor spaces safe and accessible after dark. By lighting these areas, you prevent trips and falls, creating a safe environment for your family and guests.

  3. Creating Ambiance

    • Good lighting design is all about creating a mood. Soft, warm lights can make a space feel cozy, while cooler tones give a more modern, crisp look. Thoughtful lighting placement helps you achieve the desired atmosphere, from peaceful and serene to lively and vibrant.

Key Lighting Techniques to Enhance Your Hardscape

1. Path Lighting

  • Where to Use It: Walkways, driveways, and garden paths.

  • Benefits: Path lighting ensures safe navigation and can also frame pathways in a way that draws attention to specific areas of your outdoor space.

  • Pro Tip: Space lights evenly along the path to create a balanced, inviting glow.

2. Uplighting and Downlighting

  • Where to Use It: Trees, walls, columns, and structures.

  • Benefits: Uplighting shines from the ground up, emphasizing height and structure, perfect for adding drama to trees, statues, or water features. Downlighting, on the other hand, is used to highlight areas from above, creating natural shadow effects that mimic moonlight.

  • Pro Tip: Combine uplighting and downlighting for a balanced look, especially in areas like patios or poolside spaces.

3. Wall Wash Lighting

  • Where to Use It: Retaining walls, fences, or privacy screens.

  • Benefits: This technique uses soft lights that spread across a surface, creating a “washed” effect. It’s ideal for adding subtle, widespread illumination to walls and enhancing their texture and design.

  • Pro Tip: Opt for low-profile fixtures to maintain the focus on the wall rather than the lights themselves.

4. Accent Lighting

  • Where to Use It: Water features, sculptures, unique landscaping elements.

  • Benefits: Accent lighting allows you to highlight focal points, adding visual interest and giving your hardscape unique character.

  • Pro Tip: Use accent lights sparingly to keep your focal points from competing with each other.

5. Step and Riser Lights

  • Where to Use It: Steps, stairways, and multi-level patios.

  • Benefits: Step lighting improves visibility on staircases, reducing the risk of accidents, while adding a stylish, modern look to your hardscape.

  • Pro Tip: Install these lights in the risers for a seamless look, or under the steps if you want a soft glow from below.

Choosing and Installing Hardscape Lighting

  • Choose Weather-Resistant Fixtures: Outdoor lights are exposed to the elements, so choose high-quality, weather-resistant fixtures to ensure longevity.

  • Use LED Lights: LED lights are energy-efficient, long-lasting, and come in various color temperatures. They also emit minimal heat, which is safer for outdoor settings.

  • Keep Light Pollution in Mind: It’s easy to go overboard, but too much lighting can detract from the beauty of the night. Use dimmers or adjustable lighting to control brightness as needed.

  • Layer Lighting for Depth: Combining different types of lights (e.g., path lights, uplights, and accent lights) adds dimension and prevents your space from looking flat or overly bright.

Transform Your Hardscape with J Squared Outdoor

Ready to illuminate your outdoor spaces with expert lighting design? At J Squared, we specialize in creating beautiful, functional outdoor spaces that make the most of every hardscape element. Our team has the experience and creativity to design a lighting plan that will enhance your outdoor area, making it safer, more usable, and a true extension of your home.

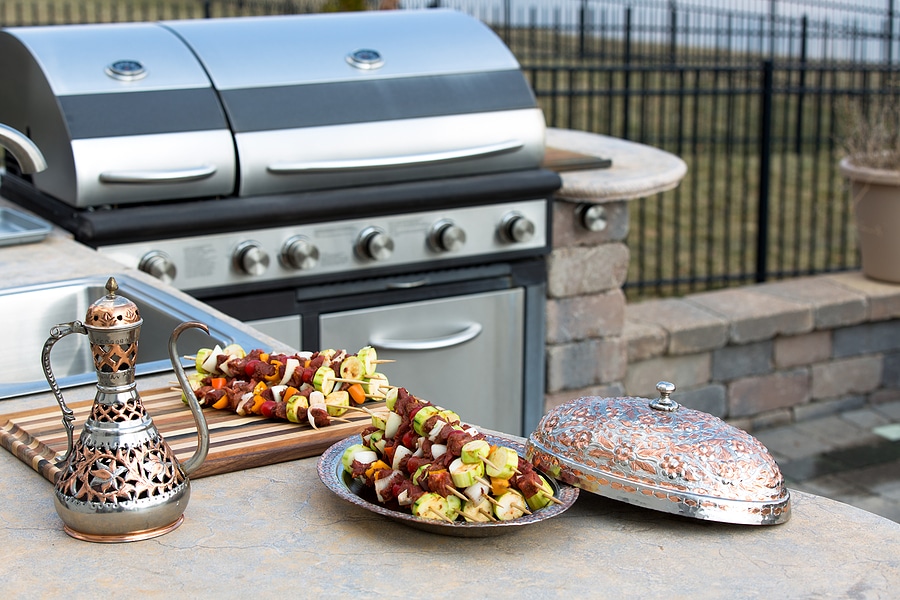
If you’re looking to upgrade your hardscape with custom lighting, reach out to us! Whether it’s a cozy patio or an expansive outdoor kitchen, we’ll bring your vision to life with lighting that’s as durable as it is stunning.


Paver Patio Design: The #1 Rule to Ensure You Love Your New Patio


You’ve got your patio design plans in hand, and they look incredible—creative lines, intricate inlays, and stunning details. But before you dive in, it’s crucial to ask yourself some important questions. How will your furniture fit in the space? Will there be enough room for guests to move around comfortably during a gathering? Is the layout functional for everyday use? And perhaps most importantly, will that beautiful inlay be hidden under a rug or a table?

  • These are common challenges we see time and time again. Designers can create visually stunning paver layouts, but they often overlook one key principle: Form Follows Function. No matter how artistic the design is, if the space doesn’t work for your lifestyle, it won’t serve its purpose.

    The Importance of Functionality in Patio Design

    At the core of every successful patio design is functionality. When designing an outdoor space, our primary goal is to ensure the layout complements how you’ll actually use it. This is where Form Follows Function becomes our guiding rule.

    For example, a patio that’s meant for dining and entertaining will require plenty of open space for tables and chairs, plus room for people to move around comfortably. You wouldn’t want an intricate paver pattern taking up too much of that space or creating awkward angles where the seating becomes cramped.

    On the other hand, if your patio is more about lounging or relaxing, we might design areas with built-in seating or sections that allow for cozy furniture arrangements. In this case, function could mean optimizing the space for quiet time rather than large gatherings.

    Avoiding Common Design Pitfalls

    One of the most common mistakes we see is patios with beautiful curves and artistic inlays that look great on paper but reduce usable space. Curved edges, for instance, can make it difficult to place standard-sized furniture or leave awkward gaps that disrupt the flow of the patio. By using more squared-off areas, we maximize usable space, making it more practical for placing furniture and creating defined zones for different activities.

    Another common issue arises with decorative paver inlays. While they can add a lot of personality to a patio, we always ask whether the inlay will end up hidden under a large outdoor dining set, rug, or table. If that’s the case, we might suggest simpler patterns that still look great but won’t be wasted where they can’t be seen. This allows us to shift the focus to other design elements like lighting, plants, or outdoor features.

    Planning for Furniture and Flow

    To help you visualize how the space will function, we incorporate your furniture into the design. We’ll take your patio furniture—whether it’s a dining set, lounge chairs, or a fire pit—and place it on the layout to show how everything will fit. This way, you can see how much room will be left and whether there’s enough space for walking around.

    For example, if you’re planning to host outdoor dinner parties, we ensure there’s enough room to comfortably seat guests and provide adequate walking space around the table. We also consider how people will move between the patio and the house. Will there be easy access from the patio to the kitchen for serving food? Are there clear paths to other areas of the yard, like the pool or garden?

    Another important factor is traffic flow. If the patio is being used for larger gatherings, we design pathways wide enough to handle the extra foot traffic without creating bottlenecks. Proper flow also means ensuring access to the patio is simple, whether you’re stepping out from the house or moving between different sections of the yard.

    Practical Examples of Form Follows Function in Action

    Here are a few examples of how we’ve applied the Form Follows Function principle in recent patio projects:

    • Outdoor Kitchens: One client wanted an outdoor kitchen space but didn’t want to lose too much patio room. Instead of spreading the kitchen across the entire patio, we designed a compact but fully functional kitchen area with everything the client needed while preserving space for a large seating area. This allowed them to entertain guests without feeling cramped.

    • Fire Pits and Seating: For a client who wanted a fire pit as the focal point, we centered the design around it and opted for a circular seating arrangement. We designed the surrounding space so that it was comfortable for gathering, leaving wide walkways to ensure people could easily move in and out without disrupting the cozy atmosphere.

    • Poolside Patios: In a poolside project, the client wanted both a sunbathing area and a shaded dining space. We used square, open areas near the pool for lounge chairs while creating a shaded dining nook using a pergola. This divided the patio into clear zones for relaxing and dining, ensuring each area had the proper layout and function without clutter.

    The Little Details That Make a Big Difference

    It’s easy to get carried away with the aesthetic possibilities of a new paver patio, but it’s the practical details that make a patio functional and enjoyable. Small considerations like making sure there’s enough space to move comfortably around furniture, ensuring smooth traffic flow, and maintaining easy access to your home can all be the difference between a patio you like and one you truly love.

    In conclusion, while beautiful designs are certainly important, always remember that Form Follows Function. Your patio should be designed to support your needs first, and aesthetics can be layered on top of that foundation. By carefully planning for furniture, traffic flow, and everyday use, we ensure that you’ll not only love how your patio looks but also how it works for you.

J Squared Outdoor Living and Lighting Hosts the Annual SynkedUp Contractor Summit!

At J Squared Outdoor, we are passionate about helping others in our industry grow and
succeed. This year, we were honored to host the Annual SynkedUp Contractor Summit, an
event that brings together landscape and hardscape contractors from across North America for
a few days of networking, education, and inspiration. The summit is a must-attend event for
contractors who are in the grind of running their own businesses and looking to connect with
like-minded professionals, gain valuable insights, and find the motivation to push their
businesses to the next level.


What is the SynkedUp Contractor Summit?
The SynkedUp Contractor Summit is an annual event designed specifically for contractors who
want to improve their operations, grow their businesses, and increase profitability. Over the
course of a few days, attendees have the opportunity to network with other contractors facing
the same challenges, learn from industry leaders, and get a behind-the-scenes look at
successful operations.
This event offers a unique combination of business education and hands-on learning. From
in-depth discussions on systems and processes that have helped contractors thrive, to live
demonstrations and tours of real job sites. The event isn’t just about talking business; it’s about
pulling back the curtain on what works—and what doesn’t—in the hardscaping and landscaping
industries.


Jeremy Swihart’s Keynote and Jobsite Tour
As this year’s summit host, our owner Jeremy Swihart took center stage as one of the keynote
speakers. Jeremy shared his journey of building J Squared into a leading hardscaping and
landscaping company in Ohio. He emphasized the importance of implementing solid systems
and processes to streamline operations, increase efficiency, and drive profitability. Contractors
walked away with practical advice and real-world examples of how these strategies have
transformed his business.
Jeremy didn’t just speak from the stage; he also gave over 150 contractors a personal tour of
one of our most recent pool installation and hardscaping projects. This jobsite offered a firsthand
look at the level of craftsmanship and attention to detail that sets J Squared apart.


A Behind-the-Scenes Look at J Squared’s New Shop
In addition to the jobsite tour, Jeremy also hosted a tour of our newly built shop. This new
facility is where the magic happens—it's where ideas are turned into reality, and where our team
collaborates to bring client visions to life. Equipped with the latest technology and tools, the
shop is a prime example of how efficient workflows and organized processes can help a
business scale while maintaining high-quality standards.

The shop tour was part of the summit’s business spotlight, a feature of the event where the
host’s operations are put on display to provide valuable learning experiences. Attendees were
able to see how J Squared structures its day-to-day operations, manages inventory, and fosters
a work environment that encourages excellence.


Building Community and Collaboration
One of the most powerful aspects of the SynkedUp Contractor Summit is the sense of
community it fosters. The summit brings together contractors who understand the day-to-day
challenges of running a business, offering a space where they can share their experiences,
learn from each other, and form lasting connections.
This event goes beyond just education—it creates a network of support where contractors can
collaborate, share resources, and continue learning long after the summit ends. We’re proud to
have hosted such a dynamic and impactful event that not only provided valuable insights but
also strengthened the bonds within our industry.
Hosting the Annual SynkedUp Contractor Summit at J Squared Outdoor was a remarkable
experience. From the keynote by Jeremy Swihart to the educational sessions and
behind-the-scenes tours, this event was a testament to the importance of sharing knowledge
and building community in the industry.
As we look ahead, we remain committed to excellence, and we can’t wait to continue growing
alongside our industry peers. Thank you to everyone who attended the summit, and we look
forward to what the future holds for J Squared and the entire contractor community!

Transform Your Pool Deck with pavers: Fresh Upgrades for a New Look

At J Squared, we specialize in landscape design and build projects, with a focus on residential landscape remodeling. One of the common issues we encounter is old swimming pools with outdated concrete decks and unsightly white coping strips. Many of our clients are surprised to learn that we can completely transform the look of their pool deck, making it an attractive and inviting feature of their outdoor space.

Common Pool Deck Issues Does your pool deck suffer from any of these problems?

  • Aging concrete: Is the surface sinking, settling, or cracked?

  • Outdated white bullnose coping: The white trim around the perimeter of your pool might be an eyesore, detracting from the overall aesthetic.

Something like this?

The Solution: Pavers We have a solution! By replacing old, worn-out concrete with pavers, we can give your pool deck a fresh, modern look. Pavers come in a variety of styles, colors, and textures, allowing you to customize the design to complement your home and landscape.

Why Choose Pavers for Your Pool Deck?

  • Durability: Pavers are built to last and withstand the elements, ensuring a long-lasting, beautiful pool deck.

  • Low maintenance: Unlike concrete, pavers are easy to maintain and repair, giving you peace of mind for years to come.

  • Aesthetic appeal: Pavers provide a clean, sophisticated look, transforming your pool area into a stunning focal point of your backyard.

Here’s the revised version of that section:

Our pool deck transformation process is thorough, ensuring a beautiful and long-lasting result.

Here's how we do it:

  1. Bullnose Coping Installation: We begin by cutting and adhering a bullnose coping around the perimeter of the pool, with a 2-inch overhang. This provides a polished, finished look and effectively conceals the old white coping strip.

  2. Paver Installation Over Concrete: Next, we level the existing concrete surrounding the pool and cover it with high-quality pavers. By utilizing proven techniques, we've achieved excellent longevity when installing pavers over concrete. The end result is stunning, dramatically improving the look of your pool area.

  3. Safety Cover Anchor Reinstallation: One common concern is how safety cover anchors will be installed in the new pavers. It's actually quite simple—we use GPS surveying equipment to record the exact location of each anchor before we cover them with pavers. This allows us to easily drill new anchors in the precise spots when it's time to re-install the safety cover.

  4. Reinstalling Pool Features: In addition to upgrading the pool deck, we can also reinstall existing features like diving boards, slides, railings, and ladders into the new pavers. This seamless integration ensures that your pool remains fully functional while looking better than ever.

This approach offers a complete solution for your pool deck, blending functionality with aesthetic appeal.

With this process, you’ll not only enjoy a refreshed pool area but also gain a durable, long-lasting surface that elevates the entire backyard experience!

How To Create Winter Interest

A lot of the time, plant selections are based on what will shine in the summer months and to a lesser extent in the spring and fall months.  Why?  Because those are the seasons that will see the most use of outdoor living spaces.  Then in the fall, we chop down grasses and perennials (unless you’ve read our fall clean up blog) and we’re left with some skeletal shrubs and a few paltry evergreens to provide “interest.”  It doesn’t have to be that way.  In fact, I strongly believe that you should be able to enjoy the natural beauty of your landscape even in the winter months.

 Here are four ways to add texture, color, and movement to your winter landscape.

 Bark, Stems & Twigs

Bark becomes an important ornamental element in winter when the shedding of leaves exposes trunks and branches.  From warty to smooth, peeling to furrowed, tobacco to cinnamon-red, salmon-pink or stark white, the variety of bark colors and textures is fascinating.  Another quick and easy way to add dramatic winter interest is to plant deciduous shrubs or trees with colorful and/or distinctive stems and twigs.  Attracting the eye with their bright, showy colors, the twigs may be brilliant scarlet, olive-green, greenish-gray or even black.  They may be straight or enjoy lovely curling shapes.

(Pictured Below: Paperbark Maple, Red Twig Dogwood, Sycamore, and Harry Lauder’s Walking Stick)

 Fruits & Berries

Some trees and shrubs display beautiful fruits in late summer or fall, which persist into winter.  In a glorious display of crimson, orange, yellow or even purple, their attractive fruits adorn their branches in eye-catching bouquets, which gleam like jewels in the soft sunlight.  In addition, the fruits of some species provide wild birds with high protein food.

(Pictured Below: Winterberry, Arrowwood Viburnum, Firethorn, and Beautyberry)

 Ornamental Grass

Attractive, easy to grow and low maintenance, ornamental grasses are invaluable additions to the winter garden.  Waving gracefully in the slightest breeze, they add movement to the garden, but also texture and color since most warm up to shades of bronze, tan or russet in the cooler months to create an impressive display.  They offer a rich and interesting contrast to the emerald evergreens, bright crimson berries and crisp white snow.  In addition, many are a source of food and shelter for birds.

(Pictured Below: Karl Foerster Grass, Northern Sea Oats, Maiden Grass, and Prairie Dropseed)

 Winter Flowers

While flowers are usually associated with spring or summer, they can also contribute to the beauty of the winter garden.  Adapted to endure harsh winter conditions, they bring the garden to life with their bright colors and attract the eye.  Most people celebrate daffodils as the harbingers of spring, without being aware that many other plants flower much earlier.

(Pictured Below: Witch Hazel, Lenten Rose, and Cornelian Cherry Dogwood)

 Follow us on Facebook to discover more plants with winter interest (See November for ornamental grass suggestions) or click below to schedule a consultation.

How Can You Help Save the World?

bee on marigold.jpg

It’s not just bees that are dying at an alarming rate – bats, birds, and butterflies have all seen a dramatic reduction in their populations over the past few decades.  Habitats have been affected by farming practices, urbanization, and widespread pesticide use.  But why should creating a place in your yard to encourage pollinators be important to you?

More than 85 percent of flowering plants require an insect for pollination, which allows for the production of fruit and seed.  These fruits and seeds are a part of the diet of about 25 percent of birds and many mammals.  Each year pollinators affect $577 billion in global crops including $235 billion here in the United States.  Native bees pollinate an estimated 15 percent of the U.S. fruit, nut, vegetable, and field crops.  Without pollinators, the world would be less of a feast for the eyes and stomach.

OK so now you want to do your part to help save pollinators.  And you like watching birds, so maybe you want to attract more of them to your yard as well.  What can you do?  Create a bird and pollinator habitat of course.  That sounds like a lot of work – and it can be if you get super crazy about it.  The good news is that your yard probably already provides some of the necessities needed to attract pollinators and birds – you just need to beef it up a little.  That sounds pretty doable doesn’t it?  Here are four components needed for a successful bee, bird, and butterfly habitat.  Add a little or lot…just remember, every little bit helps.

butterfly garden.jpg

1. Food – Bees need both pollen and nectar while hummingbirds and butterflies seek only nectar.  Providing a variety of flowers will attract a diverse array of pollinator species.  Bees and butterflies are attracted to flat, open blooms with big petals for easy landing and to blooms with short nectar tubes.  Color plays an important factor in helping pollinators to find food.  Bees can easily see white, yellow, blue, and purple flowers.  Butterflies and birds flock to red, yellow, orange, pink, and purple blooms. 

Native insects have special relationships with native plants from their regions.  Some native pollinators aren’t picky, but others will only feed on native plants that they have come to know.  In order to provide a consistent food source, stagger bloom times through the year and provide flowers that bloom for long periods.  Plant in larger groups – 3-5 plants instead of singles – so pollinators can forage without expending a lot of energy.

bird eating coneflower.jpg

Native trees such as oaks, willows, birches, and maples as well as native herbaceous plants such as goldenrod, milkweed, and sunflowers host many caterpillar species that are a vital source of protein for birds, especially during breeding season.  Many shrubs and small trees provide berries that ripen at different times, so include a seasonal variety: serviceberry and cherry for birds during the breeding season and summer; dogwood and spicebush for songbirds flying south; cedar and holly trees to sustain birds through cold winter days and nights.  Trees such as oaks, hickories, and walnuts provide fat and protein rich food that birds hide or cache to provide food through the cold winter.  Native sunflowers, asters, and coneflowers produce loads of tiny seeds that are finch and sparrow favorites.  Red tubular flowers such as native columbine, penstemon, and lobelia serve up nectar for hummingbirds.  Flowers in the aster family, such as coneflowers, asters, and joe pye weed provide seeds for birds and are also very attractive to pollinators.

Need some help with plants?  Ohio State University and The Xerces Society have some great info on pollinators and the Ohio Department of Natural Resources is a great resource for attracting birds.

2. Water – Birds, bees, and butterflies all need water.  Bees use water to stay cool, control the humidity of the colony, dilute stored honey that has crystallized, and aid digestion.  Provide a shallow and wide source of fresh water such as a frisbee or a birdbath.  Place corks, rocks or twigs in the water so they have a place to get close and not drown.  Birds need water to drink as well as bathe.  Like bees, they prefer a shallow water source.  Butterflies don’t need to drink water like bees or birds.  Instead they need places for “puddling” which provides butterflies with critical minerals.  Bury a shallow plate or bowl in the ground and fill it with damp sand and a few rocks for landing spots.

3. Shelter – There are two ways to provide shelter for birds and pollinators. The first is to provide boxes or houses.   Searching the internet for insect boxes, you can find a wide array of pre-made homes for bees and butterflies.  If you prefer a more natural solution, leave a few dead trees standing (for wood-nesting bees) or leave some bare soil (for ground-nesting bees).  On cool, cloudy or rainy days, butterflies prefer to seek shelter…providing a small log pile somewhere on the property will do just that.  For warm sunny days, provide a flat rock in the garden for them to rest and sun themselves.  Natural shelters for birds include both deciduous and evergreen trees and shrubs as well as long ornamental grasses, and dead, hollow trees.  An additional perk to providing natural shelters for birds is that these shelters are often food sources for them as well.

Bee Nesting Box

Bee Nesting Box

Butterfly House

Butterfly House

4. Nesting – Providing shelter for bees and birds also provides them with a nesting site to raise their young.  Most native bees are solitary and lay eggs in tiny tunnels in dead trees, fallen branches, hollow stems or in sandy soil.  Leave standing dead trees, fallen logs, and bare patches of sandy soil or install a bee house filled with nesting tubes.  Butterflies, on the other hand, do not use their shelter sites to raise their young.  They lay their eggs on plants that will double as a food source for their larvae.  These are typically called host plants.  Although butterflies may feed on a variety of nectar plants, the caterpillars of each species have specific host plants.  For instance, milkweed is the only host plant for monarch caterpillars (native stands of milkweed are fast disappearing and the U.S. Fish & Wildlife Service is in the process of assessing whether monarchs should be protected under the Endangered Species Act).  Occasionally, butterflies will pupate (the process of changing from a caterpillar to a butterfly) on their food plant, but often they move to another sheltered location or in the leaf litter to pupate.  Keep in mind that host plants are there to be eaten, so be sure to place them where unsightly leaf damage can be tolerated.

 The North American Butterfly Association has a good list of caterpillar and nectar plants for Ohio butterflies.

A word about pesticides.  Most insecticides such as malathion, sevin, and diazinon are marketed to kill insects.  Try to eliminate pesticides whenever possible.  Attract ladybugs, predatory wasps, and other natural enemies of garden pests.  Native plants attract these beneficial pest predators.  These insects are a sign of a healthy garden and are an important food source for birds.  If you must spray, use only organic or natural pest deterrents such as soap, garlic, and chili pepper.  Spray only at night when flowers are not blooming and when it’s dry and windless.  Use products that target specific pests rather than broad-spectrum ones.  Avoid anything labeled as toxic to bees or that kills “weedy” flowers pollinators visit.  Specifically, avoid garden products that include neonicotinoids.  And above all – follow the application instructions and use sparingly.

butterfly on flower.jpg

Feeling a little overwhelmed with information overload?  Not sure how to make a pollinator or bird garden fit in with your style and maintenance needs?  Give us a call!  We have a designer on staff who is passionate about these types of gardens and loves to share her knowledge with others (she wrote this blog after all).